CSV upload of multiple users
Where to find
- Back Office -> Settings and Management -> Users -> button: Upload users
Description

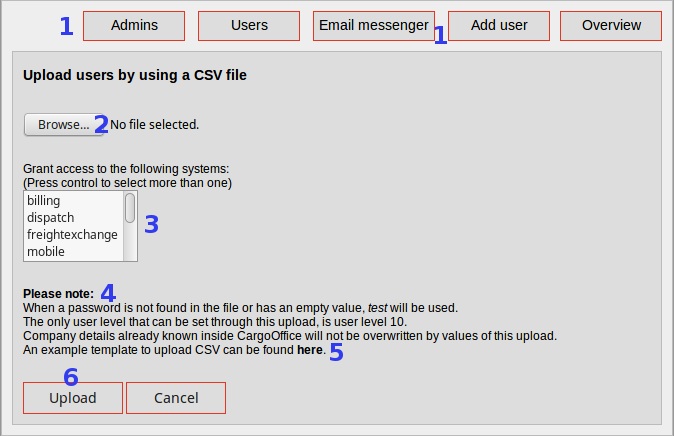
- Buttons as explained in the user list.
- Browse your local file system for the file you want to upload.
Note: an example file can be find here (at item 5). - Define system access for the users you are uploading.
Available systems in your application are defined in the user list # 11
If you are not sure which systems to grant access, ask Cargo Office Programmers or play safe and only define system orderentry. - Some notifications when using this tool.
Please note: the hierarchy in this transport application is (from up to down): Carrier -> Customer -> User
- Users are part of a customer (by field: customerID).
- With this tool you are only uploading user details.
- If no information of a customer is known, the uplaoded information is also displayed as customer information.
- If customer information is already known, then it will not be overwritten when using this tool.
- Click here to find a CSV-template you can use as a base for uploading users,
In this template all user fields you are able to upload, are defined.
Tip: start with only 2 (lines of) users. If something is wrong with your CSV, then you do not loose time de-bugging. - Click upload, to upload your CSV.
If the upload is not successful, a message in red is displayed at the top-left-corner.
Topic revision: r1 - 2017-08-21 - RutgerRutgers
Ideas, requests, problems regarding TWiki? Send feedback

