Start-up Guide for TransportSticker.com
About TransportSticker
- By using TransportSticker you are able to print your desired label that you can add to the package you want to have transported.
- TransportSticker is created for Carriers as well as Consignors.
- Some users print the label on a blank sticker (hence the name TransportSticker), others glue it on the package or put it in a clear plastic envelope that is attached to the package.
- In the logged in version you'll have a choice from different label sizes and different label types.
- On request we can make you a customized label with a customized barcode.
How to start (quick version)
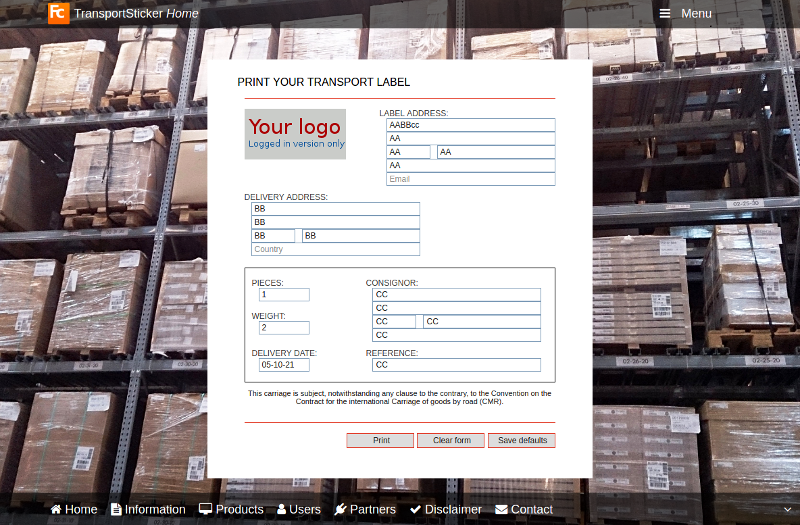
- Go to TransportSticker.com.
- Fill out the form and press Print at the bottom of the form.
- That's all and it's free!
- Please consider opening an account, some of your benefits are:
- A choice out of 10 different labels.
- All your Labels are stored for a year so you can retrieve or reuse them again.
- Addresses will be remembered so that you don't have to enter them again and again.
- Print a CMR, a BoL, a pickup list, a booking form or other documents.
- Your Logo on all your labels.
- Your TransportSticker account can be combined with any other FC-product (eg. CargoOffice.com, CargoStart.com, CMRprint.com, FreeCargo.com, TrackTrace.Info, TransportCommander.com, TransportGuide.Info, etc).
- Many options to import EDI-files of multiple shipments.
- Use the Contact or Register link at the bottom of the screen if you are interested in an account.

How to start (Login version)
- Go to TransportSticker.com.
- Select Menu -> Login from the top right of the screen.
- Enter your email address and password.
- Note: If you already use another FreeCargo Product (e.g. CargoOffice.com, CargoStart.com, CMRprint.com, FreeCargo.com, TrackTrace.Info, TransportCommander.com, TransportGuide.Info, etc) you need a different account.
Just ask us. - If you are a new user and you need an account; use the Contact or Register link at the bottom of the page.
Shipment overview
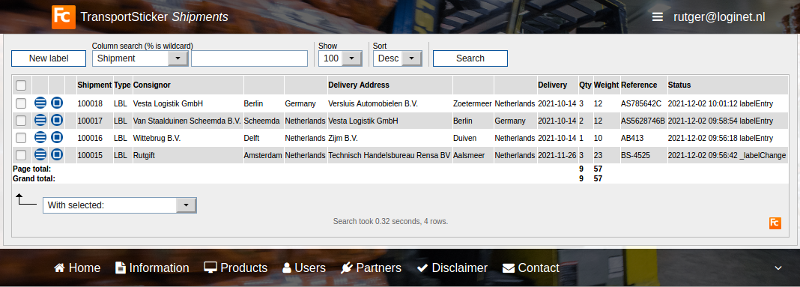
After a successful login you will see a list of earlier labels you've entered, for example:
- Press the New label button on the top left screen to add a new label.
- For every shipment there a re two buttons:
 Edit button; open Label for editing your shipment details.
 Tasks button; things you can do with this label, especially printing your desired label.
- By using the With selected function on the bottom left of the screen you can select multiple shipments and perform one task.
- You can add or modify columns in your settings: Menu (top-right) -> Settings -> Shipments grid columns
Adding or editing a label

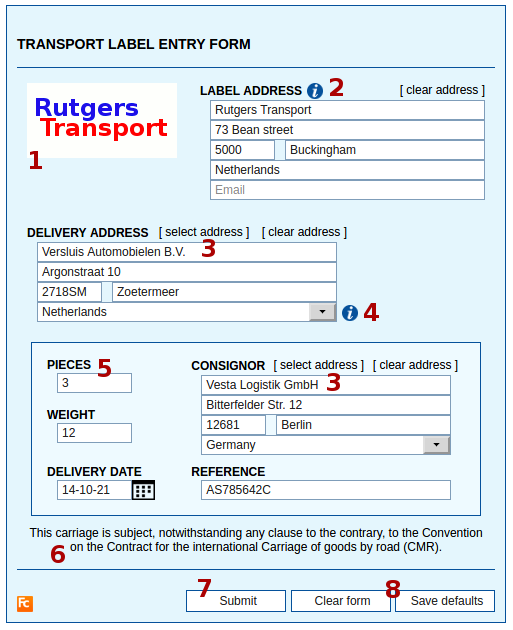
- After joining TransportSticker we'll add a logo to your credentials asap.
- This logo will become visible at most of your labels and other documents as well.
- If you want to use another logo tell us by using your feedback option: Menu (top-right) -> Feedback
- The label address (the address of the company connected with the logo) is automatically filled with your user details
- See: Menu (top-right) -> User details
- Using these [ select an address ] links you can select an address from earlier addresses you've used.
- Deactivate the pop-up blocker in your browser settings in case the [Select an address] functionality doesn't work.
- Tip: You can also type the first letters of the name in the name field.
Earlier addresses with that name will appear and you can quickly select the address you need.
- You can adjust the options for country in your settings: Menu (top-right) -> Settings -> Countries
- Pieces is the amount of labels that will be printed.
- This is the default text that is printed on most of your labels.
- After submitting the form you go back to your shipment overview.
- There by using the task button you can print your desired label.
- User options:
- When clicking the Clear form-button all filled in values of that moment are cleared.
- When clicking the Save defaults-button all filled in values of that moment are stored, so you can use these values again next time.
- When you want to erase formerly stored values, then first click button Clear form and secondly click button Save defaults.
If requested, send us a message by using Feedback.
Tasks button
After a succes- All labels are displayed in the HTML-window of your browser.
You can download or save the labels in PDF. We can also make the labels directly available in PDF, if requested send us a message. - The label address details are filled automatically with the details of your user account.
If you like to modify these details, go to: ....
These label details you can overwrite with new values.
If requested we can delete these label adress details from the label entry form and fill these values by a default value that you can alter your self by using a parameter.
Topic revision: r6 - 2021-12-02 - RutgerRutgers
Ideas, requests, problems regarding TWiki? Send feedback

